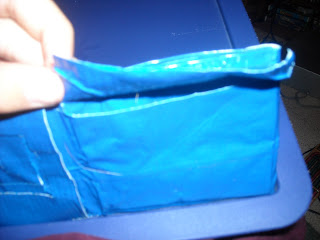
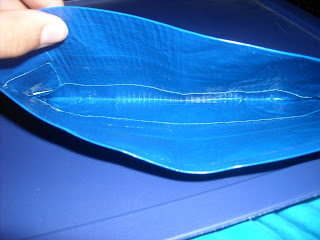
This is really the most famous of all duct tape things, and a blog about how to make things out of duct tape just wouldn't be complete without instructions on how to make a wallet out of nothing but duct tape. Why waste money on something that you use to hold your money? Plus you can have any color you want. To start, just have one roll of regular, or colored, duct tape and a pair of small scissors. I then took a regular wallet and measured the dimensions (you can make it any dimensions that you want, but this way it will fit gift cards and such). Then I took two strips of duct tape that were the right length I wanted and put them together to achieve the correct height. Then you repeat this step and cover the front of them both so that you have the front and inside rectangles of your wallet. Just tape the sides of them together. Now put a strip of duct tape along the bottom inside so that the bottom is closed up. Then put a strip along the same place but on the outside so that there is no sticky side out, and the bill carrying area is finished. Now we can start on the I.D. card slot. This is the same process that we will use for the multi-card slot and the coin pouch. Take two strips that are a few inches longer than what it looks like from the front, and the right height. Put it down with the edges going underneath to keep it attached. Then put a strip along the inside bottom like you did for the bill part. Then cover the outside and cut window to see the card you want to put inside. Now do exactly the same thing on the right side but don't cut the window, and you can put gift cards and such in here. Now for the coin pouch, make another holder on top of the first, just smaller. Then put a flap on top to keep the coins in by taking a strip as long as the pouch is wide and taping it so that the sticky side faces the bill side. Then tape the back of it and now your duct tape wallet is finished. Now you can spread the word about how awesome duct tape is just by taking out your wallet.


 This is another project where you can apply colored duct tape to the outer layer to spice it up. For this project I started out with a regular belt, a roll of duct tape, and something to punch the holes for the belt buckle. I recommend that you use an existing belt buckle, but you can make your own out of duct tape. Start by laying out a strip of tape the appropriate length that you want. then you can fold the edges in on themselves for the correct height. Then flip it over and do the same on the back. I suggest doing this several times for the added strenght. Once that is done you can put whatever you want on the outside. I went with a tye dye strip wrapped around in a helix. Now you can punch holes for the buckle and cut the end into a triangle to make it easier to go through the belt loops. Finally, attach your belt buckle on the other end and secure it on with some more duct tape. This belt will now work for both regular, and duct tape pants.


